

The customer service team is always listening, taking notes, and quantifying complaints to ensure our products are continually improved. Due to selling directly to you, the customer, via Amazon, we can use product reviews to help us improve our existing products or help further development of new products.

Creme Brulee
INGREDIENTS
- 1 quart heavy cream (947 mL)
- 1 teaspoon vanilla paste* or 1 vanilla bean, split and scraped
- 1/2 cup (118 mL) regular sugar, divided
- 6 large egg yolks
- 2 quarts hot water (1893 mL)
- More sugar for caramelizing before serving
HOW TO MAKE Creme Brulee
STEP 1: Preheat the oven to 325°F (163°C).
STEP 2: Place the cream, vanilla paste (or bean and its pulp) into a medium saucepan set over medium-high heat and bring to a boil. Watch it so it doesn’t boil over!
STEP 3: Remove from the heat, then cover and allow to sit for 15 minutes; for best results, use a ThermoPro TM01 Digital Timer with Touch-Activated Backlight. Remove the vanilla bean if using it.
STEP 4: In a medium bowl, whisk together 1/2 cup sugar and the egg yolks until well blended and it just starts to lighten in color. Add the cream a little at a time, stirring continually. Pour the liquid into 6 individual ramekins (each able to hold about 7 or 8 ounces). Place the ramekins into a roasting or lasagna pan. Pour enough hot water into the pan to come halfway up the sides of the ramekins.
STEP 5: Bake just until the creme brulee is set but still trembling in the center, or for approximately 30 to 45 minutes. (it depends on your oven and depth of ramekins, see the notes below).
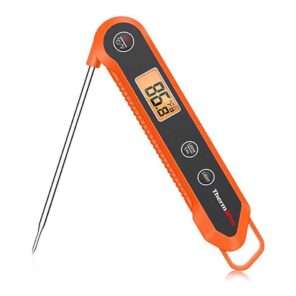
STEP 6: To be sure, insert a ThermoPro TP03H Instant-Read Thermometer into the center of a custard—don’t worry about making a hole; you can cover it with sugar later—it should register somewhere between 165°F and 175°F (74 to 79°C). (If it’s a bit over, it will still be delish!)
STEP 7: Carefully remove the baking pan from the oven and take the ramekins out of the water bath by using a spatula. Let the ramekins cool for 30 minutes, and then transfer them uncovered to the refrigerator where they can cool completely.
STEP 8: Once the custards are refrigerator-cold, wrap each ramekin with plastic wrap. Refrigerate for at least 3 hours, or up to 2 days before proceeding.
STEP 9: Remove the creme brulee from the refrigerator for at least 30 minutes prior to browning the sugar on top.
STEP 10: Unwrap the creme brulee and use a paper towel to dab the surface if you see any moisture. Hold the torch about 4-5 inches away from the surface of the creme brulee, and slowly move it closer while moving the flame.
STEP 11: Keep the flame moving so that it isn’t focused on any one spot for too long. Pull the torch away if the sugar smokes excessively or starts to turn black. Once it gets close enough, you’ll see the sugar start to liquefy and form little droplets on the surface. Be sure to get the sugar along the edges of the ramekin as well as in the middle.
STEP 12: You’ll be seeing a nice, caramel-colored glaze form on top of the creme brulee. It’s a bit tricky knowing exactly when to stop, but it’s better to stop too soon than too late. If necessary, you can always fill in any underdone spots in a minute, once the sugar cools down a bit.
STEP 13: You can serve the creme brulees just as they are and they’ll be absolutely delicious. Or, adding a few fresh berries and whipped cream is also a nice, sweet touch.
NOTES: * The cute blow torches sold at kitchen stores have never worked for me. They just don’t put out enough heat. I use what the chefs recommend and that’s the BernzOmatic Propane torch found at home depot. And it’s inexpensive!
* Don’t try to transfer the pan with water and creme brulee to the oven. Water can splash into the creme brulee WAY too easily. Don’t ask me how I know! Use a kettle or pitcher, and pour the water in while it’s in the oven.
* Vanilla beans are expensive. More and more chefs are using vanilla paste and it’s my go-to for 90% of my vanilla needs.
Tools You Need